Show Posts

This section allows you to view all posts made by this member. Note that you can only see posts made in areas you currently have access to.


Topics - RainbowTea

Pages: [1]
1

As I ran through the FH forums while causing further doubts on my sanity (heheheh), I realized how much of a family FH was to me. I know I don't appear very much in the different parts of the forums becausei'malazybutt. However, that doesn't stop me from wanting to give people Christmas gifts.

Late Christmas gifts. Some of you might hate me for that ("OMG, Coffee, why couldn't you have thought of this earlier" Yeah, yeah, I know, sorry ;A;). But I'll still love you, so hate on me as much as you want.

Basically, I went through the forums and chose the people on Santa's naughty list chose the floofs that were an encouragement to me. That doesn't mean all you other floofs weren't encouraging - I still love you all (yeah, you probably hate me even more now haha). <3 Anywho, I decided to become your fairy godmother and (bibbidi-bobbidi-boo, however you spell it) turn you all into dashing male characters that reflect your wonderful personalities. So don't ask why you all are males.

Wait, Fox Philosopher, you're a guy, right? You don't have to answer this question, but yeah ;A; Maybe I won't have to bibbidi-bobbidi-boo you.

Anyway, enough of the chit-chat. Let's do this thing. Oh, and if this isn't in the right section, I deeply apologize. You can move it if need be o3o

~*~


The Form
Username:

Appearance: (eye color & hair color) Note - you don't have to do your real eye/hair color.

Personality: (a few sentences describing yourself - doesn't have to be too detailed, just the basics of what you want me to know)


2
Le Coffee's Guide to Weaving Emotional Roleplaying Posts

[Removed because the cringe was so great that upon returning and seeing this, I nearly combusted. And that's saying a lot, considering my entire profile oozes with cringe. I cannot believe I existed.]

3
Stories / Insane Stories From 2nd Grade ... o.o
« on: September 25, 2013, 09:14:42 pm »
I was bored, and I was going through my old stories. I found some pretty crazy ones, and I decided to share them, since I have nothing better to do with them. :3

I was a violent child, apparently, judging from my stories o.o And very ignorant.


4
Character & Roleplay Tutorials / Le Guide to Making Good Character Profiles
« on: September 16, 2013, 09:03:38 pm »
Le Coffee's Guide to Making Good Character Profiles
Definition of Character(s): the key to surviving a roleplay

Good characters are the key to surviving in a roleplay. Without good ones, you'll find yourself struggling to stay afloat in this twisted, confusing world. Although it may seem complicated to bring one to life, the steps are easy and simple as long as you follow them correctly.


The Skeleton

This basic skeleton is very important. Without it, your character will immediately collapse before it can truly breathe. You must memorize this and tuck it away in your mind, but it will be here for you if you happen to forget it. The skeleton consists of the following:

Name: (First and last. Be creative and choose unique names (ex: Mali means "flower"). You could also make up a name.)

Age: (Human years, animal years, etc.)

Gender: (male, female, unknown, or none)

Appearance: (Type in a few sentences briefly describing your character's appearance, from the eye color to their height. However, it is recommended you have a descriptive paragraph so that others have a nearly accurate, good idea of what your character looks like. You could also post a picture and add any additional details.)

Personality: (This will be your character's identity. Other roleplayers will be able to recognize your character because of his/her behavior. Create a few, descriptive sentences, and make sure to mix in a few flaws.)

History: (Although some roleplays make this part optional, it's best to have a brief description of your character's past for a better story. While you don't want to be too detailed, you should avoid being vague as well, unless if nothing much is known about your character.)

However, there are some things you should avoid bringing up in a character:

Marty/Mary Sues
Vague sentences


Marty/Mary Sues

Marty/Mary Sues are one of the most annoying characters, often made by novices. Not only are they flawless, but they do everything perfectly, and there are no imperfections in them. These evil characters attract attention to themselves, and they are poisonous to a roleplay. Here is an example of a Marty/Mary Sue:

Name: Anna Wells

Age: 16

Gender: Female

Appearance: Anna has a silk curtain of golden hair that slips down to her shoulders. It's always styled perfectly, and not a single strand of hair is out of place. Her beautiful, attractive green eyes stare knowingly at you. She has smooth cheekbones and rosy cheeks in a healthy shade, along with a perfectly sculpted nose. She is beautiful in every way and has flawless skin. She looks good in everything she wears. All the boys drool over her. She has perfect curves, and she is always fashionable. No one can resist her.
 
Personality: Anna does everything perfectly and never makes a mistake. She is the smartest person in the school and the most popular girl. She is always nice to other people and is very sweet. She is also very rich, and she gives money to the poor. Anna always receives a lot of phone calls from everyone since they all love her. No one hates her.


Although some Marty/Mary Sues will not be that extreme, some roleplayers do add hints of perfection in their characters. Whether the flawless characters were made on purpose or unintentionally, it's best to avoid them in order to have a thriving roleplay. To avoid bringing a Marty/Mary Sue to life, watch out for the following in the character profile:

Flaws. No one is perfect. Although your character doesn't need to be the most horrible, sinful person in the roleplay, make sure you include one or two (ex: bad temper). While you might want your character to be good, he/she still can have a wonderful personality, despite his/her weaknesses.

Perfect appearances. There is no such thing as a girl with flawless skin, baby blue eyes, golden hair, curves, full lips, etc. or a guy with large muscles, bronze skin, etc. Your character might have a few of those, but he/she can't have it all. However, this doesn't mean your character isn't allowed to be good-looking.

Powers. If you're in a supernatural roleplay where characters are allowed to have powers, limit yourself if there is no maximum amount of powers. Your character can't be the most powerful, awesome person in the entire roleplay. This doesn't allow the others to have fun if they're the ones that always lose, and you're the one who never gets hurt.


Vague Sentences

Your descriptions are what brings your character to life. If you have vague, short sentences that don't tell people much, they're not going to be very interested in your character. Each and every person has a story, including your character. Tell it. Maybe the scars on your character's wrist are the leftover reminders of the time he went through depression. Or perhaps the necklace she never takes off is from her dead mother. These are small, but very powerful details that can influence how people look at your character.


If you suspect a roleplayer's character is a Marty/Mary Sue, don't be afraid to say so. However, be nice about it because no one is perfect. Watch out for signs of perfection in your characters as well!

May the roleplays thrive and be ever in your favor.

5
Character & Roleplay Tutorials / Le Guide to Making Character Banners
« on: September 15, 2013, 11:33:13 pm »
Le Coffee's Guide to Making Character Banners

Definition of Character Banners: A smexy picture of your character with his/her name beautifully inscripted upon the image in a tasteful manner

In roleplaying, it can get frustrating when you can't keep track of all your characters running all over the place (beggingthemtopleasecomeback). Roleplaying becomes more difficult when you can't remember the smexy faces of your characters, and you have to go ALL the way back to the seas of profiles ...

That's when character banners come in. They're gorgeous and easy, really. You can make them as beautiful or as ugly as you want them to be. However, don't you dare just slap a name on that image and think you're good to go. Making character banners is an art. Yes. It is. Your characters want to look smexy in their banners, not look like they'd just been thrown together. They'll get mad at you, start a revolution, and before you know it, they'll be ruling the world like a boss.

Get a hold of your characters. Slap them into line with these character banners. Show them you're boss. A boss of epicness.

Beautifying Le Image

We'll start with the image of your character. Let's say I'm going to smexify my character Simon Kelis (I do not own the image, butiwishididjustkidding.


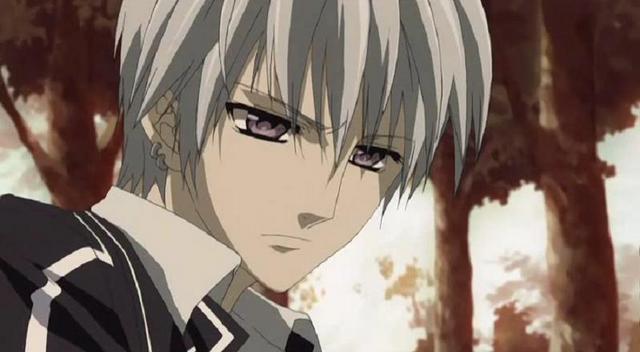
Check out his gorgeous face. Just kidding. Don't tell him I'm kidding or he'll kill me.

For a professional, clean look and good options, you'll have to make the wise decision of which photo editor you're going to use. For me, I go with my best friend: PicMonkey (clicky). It's quick, simple, and surprisingly easy with good options. It's also free (except there are a few options that require paying, but don't worry. The free stuff is still excellent). 

Since I have Simon's picture saved onto my computer, I'll just upload his image onto PicMonkey, using their "Edit a Photo."

Uploading a photo onto PicMonkey

Once you click "Open," you should be directly led to the photo editor. You'll see your character's image on the right while a bunch of organized options lay on the left.

Uploaded image and viewing options


Darkening the Image

You can crop the image if you feel like it's too big. You are also given the opportunity to resize the photo if necessary. Once you've done that, click the second button that has the magic wand icon on it. This will give you options to help you beautify your image and make your character's good looks really stand out. A new set of options should pop up, and you should no longer see the options to crop or resize.

First, darken the edges of the photo. This is important because not only does it draw attention to your character's smexy face, but it also dramatizes the photo and the focus on the character stand out.

To do darken the edges, scroll down until you reach the category "Basic." Underneath "Basic," you should see the option "Dark Edges." Once you have clicked it, you have the opportunity to darken the corners as much as you want. Choose the fade option if you don't want the darkness to be that obvious. However, how dark you would want the photo to be will depend on the amount of blackness already set in your photo.

Since Simon's photo isn't very dark, I can set the options a little high. "Size" will determine the size of the darkness in the photograph, while "Intensify" chooses how dark the photo will be. There is also a color option if you don't want dark edges, but it is recommended you keep it at black. Click apply once you've finished - don't worry if you mess up because you can always hit the undo button (found on the top menu bar or you could just hit "Ctrl + Z").

Darkening the edges of the photo


Adding Cross Process to the Image

Now that the edges have been darkened, you can still add a little more drama to the photo and draw more attention to the face. To do so, scroll up till you see "Cross Process" underneath the category "Tried and True." Click it.

See how dark your photograph just became, along with a tint of color? You can make the tint green, blue, or red. Normally, I keep my photographs green, and I rarely use the red, but this is up to you. You can fade it away if you think it's a little too much.

Using cross process on your photo


Yellowing the Image

You can continue onto placing your character's name onto the image if you're happy with the results. However, you could also make your image look a little old and ... perhaps antique (old in a good way, of course)?

To do so, click on the option "Dusk." It should be found underneath "Cross Process." However, note that "Dusk" doesn't always look good on all characters. Some of them look hideous, while the beauty of others is enhanced dramatically. Play around with the fade option till you're happy.

Adding dusk to the photo


Applying Sepia to the Image

However, some people just might not want to stop there. They might want to make their character look even more old and yellowed.

Scroll on down to "Sepia" underneath the category "Basic" and click it (of course you click it, what else?). You can choose different tints and find out which one looks best with your character, but do NOT forget the fade button is available.

Unfortunately, Simon looks like Medusa with that "Sepia" option on, so I won't use it on him. Poor soul. He's too young to suffer such agony.


Using Sepia on the photo


Adding your Character's Name to the Image

Now, we're completing the final step: adding the text to your character.

Look at your smexy character. Gorgeous work you've done.

Note that there are many other options on PicMonkey that you could always play with. However, due to the lack of time (partiallymylaziness ... butmostlylackoftime), this guide will focus only on the basics of making a character banner.

Click the "Tt" option, also known as the "Text" option.


This is the epic part. PicMonkey has SO many freaking awesome texts to choose from (except for the ones that have the crowns on them. You have to pay to use those, unfortunately). They're beyond awesome, actually, so awesome is jealous of those texts. Choose the one that fits your character's personality best.

For example: If your character was a vampire, the "Dracula" text is probably best for them. Or, if your character was a gentle, shy girl, a text using feminine cursive (ex: La Bella Aurore) would fit them perfectly like a glove. For Simon, I'm going to use a simply neat, sophisticated-ish (emphasis on ish) text since he is very polite and has well-groomed manners.

Click on the desired text before mousing up to the giant button that screams "Add Text." You must click on the text you want first before "Add Text."

Adding the character name

Upon clicking "Add Text," scream with joy because PicMonkey also provides you with MORE options to personalize your text! Not only are you able to change the color of your text, but you can also resize it, cause it to fade, and move the text around to any area on the image (provided that the text is still within the image).

Since I don't want all the attention to be drawn to the text, I like to fade the character name a little, but I limit my use of the fade to prevent the text from completely fading in the image.


Saving Your Smexy Masterpiece

Once you're finished with the character banner, click "Save" to save your banner to your computer (of course you do this because you've worked your butt off on this).

Le Saving Work


Showing Off Your Character

Upload your image to the forums and voila. Your character appears officially smexy and is ready to go.


I hope you found this guide useful. May the roleplays be ever in your favor.

6
Poems / Le Coffee's Poem Collection (UPDATED: 9/25/2013)
« on: August 29, 2013, 08:33:48 pm »

7
Stories / Skinless (a short story) (UPDATED: 9/25/2013)
« on: August 29, 2013, 02:41:05 pm »

8
Art Gallery / Le Coffee's Arty Art (UPDATED: 7.2.14)
« on: August 29, 2013, 01:35:25 pm »
C o f f e e   P r e s e n t s   .    .    .


? B a s i c   I n f o r m a t i o n ?

This art was created by yours truly. This thread will consist of both traditional and digital art.
Most of these drawings will be of anime people/animals.
A lot of them have also been colored by hand, which explains why I'm very protective of them.


? R u l e s ?

I do not tolerate copying or stealing of my art. If I suspect you've done either, I will not hesitate to contact the moderators and point them towards you.

Comments would be nice, but please keep a kind tone throughout them. I would love it if this thread was hate-free.

I do take art requests, although I've been busy with school lately. Keep an eye out for the days when I accept requests.


? A r e   R e q u e s t s   O p e n ? ?

Yes  or   ? No
 
Sorry, lovelies, but school comes first. I might accept a request when the assignments die down a little.


? T h e   A r t ?

I drew this anime dog for a kid that my family is sponsoring.


Neko girl. I drew this with a pen, so I had to deal with my mistakes. It's a very good learning experience. You should try.


This is my first time doing chibi - it's a recent drawing. Crowmist (gray wolf) and Autumn Breeze (white wolf), (I SHIP THEM). They're part of a roleplay Oreoheroz and I are doing. 


Tweek Tweak. This was an art request from one of my friends. Excuse the poor quality (*glares at scanner*). I made him in manga form instead of his original cartoon form.


Le Tweek Tweak in cartoon form. Poor kid. <3

Oh dear. The art just keeps searing your eyes more and more, doesn't it?


This is a birthday card I designed for a friend. Just thought I'd throw it out there for you card lovers. c:


You may recognize this one as my avatar. A sleeping cat - one of my most recent drawings. I made the quote too, so please don't steal it. ;-;


Asher. His pelt is supposed to be that way. Don't judge me. He had a hard life so that's why I decided to draw him (he's also from the roleplay that Crowmist and Autumn Breeze are in). This drawing, I'm particularly proud of. I think it's because I worked endlessly on this for hours. 


OreoHeroz's Art Request


Taylor's Art Request


Dude with Spikey Hair


MocaCoca's Art Request


Art Request (from different website, partially colored)


Wolf with Headphones


In Memory of Dark Petal


? 2.2.14 ?


Golden-Haired Anime Boy


Chibi with Coffee


Chibi with Popsicle

? 2.11.14 ?


Simply an anime girl. I was playing around with the shading, so it's not exactly my best shot.


Art request. Don't judge the bunny ears. I had no idea how to draw them.


? 7.2.14 ?


I've taken to accepting requests for book covers (doing the cover art and making the cover).


More cover art.


Jim Moriarty fanart


Random dude in sunglasses.

? Y o u   H a v e   R e a c h e d   T h e   E n d ?

Thank you for viewing Coffee's gallery of doom. I hope you enjoyed the sensation of getting your eyes burned. If you wish to relive this horrifying experience, note that I will be posting up more artwork as I draw. However, since school is starting soon (yay and nay), I'm not sure how often I'll be able to dive into my sketchbook (thesketchbookofultimatehorror).

I would appreciate some criticism. Criticize your hearts away, but no mean comments please.


? L i s t   o f   R e q u e s t s ?
 
Oreoheroz - Zireal in chibi form
JimMoriarty - Jackclaw in anime form (head to torso)


Request Application

Your Username:
Character Name:
Gender:
Species: (Anime Human Only )
Head or body: 
Detailed appearance or Screenshot:
Personality: [Optional]
Pose: (Please don't make it too complicated.)
Extra:

9
Introduction / Time for Tea!
« on: June 18, 2013, 02:38:48 pm »
Hello, I'm Rainbow Tea! I found Feral Heart while aimlessly surfing on the Internet, and I decided to join in hopes of finding a website to settle down in for a while instead of hopping from one site to another. Roleplaying is one of my favorite things to do, especially since it involves writing. I also love drawing anime. I look forward to getting to know you all and roleplaying! :D

Pages: [1]